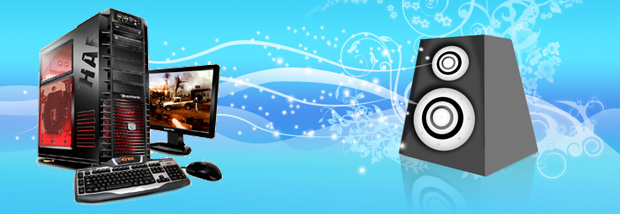
The best practice in building gaming computer is to first understand your requirements and budget and then work around the plan to build you custom pc. Children of all ages including teenagers and below ten love to hang with their computers and play video games. This article explain how you can build desktop pc for kids that can let them play video games.
Small kids love to play flash based internet games as starters and go to websites such as disney, y8, cartoon network to find their favourite cartoon game. However in case of teenagers they need more heavy games that will have more realistic graphics and provide an incredible environment to enjoy an imaginary world of video game. Games such as World of Warcraft (WOW), Diablo, Need For Speed, Counter Strike, Call of Duty etc. You should get a custom gaming desktop or laptop that can render intense graphics oriented games in fast paced environment, so it can serve for both purposes.
In order to create you own pc you will need basic hardware knowledge of a gaming rig.
Note Down Ingredients of Custom Gaming Rig
Gaming Case + PSU: The box in which all the hardware components are installed is called a computer casing, in terms of gaming machines these are called gaming cases. If you need to build professional computer for playing games then you should consider checking the top 10 gaming cases because these have high customer ranking, this list includes some of the best coolermaster cases as well as antec cases which has unique design and extremely reliable for gaming machines. PSU stands for “power supply unit” which is a small box whose job is to deliver electricity to all the hardware components in your computer casing. PSU comes part of a casing or you can buy it separately and install it in your existing computer case. A desktop casing is where you assemble all the hardware components into a single unit comes in form of a rectangular or cube box.
Processor or CPU: A computer processor is a small silicon chip which is considered as the brain of your computer, so for gaming machine you should consider installing a faster brain! These days dual and quad core CPUs are good fit for running games, Intel’s series of core i7 are the best in the world however you can look for cheaper options such as core i5 and AMD CPUs or APUs to build up an economical gaming machine. Modern CPUs come with high performance fans to cool down the chip
System Memory: Heavy games means they will need more real time memory which is being communicated with processor for processing. So if you need to run today’s complex games like battlefield then you should install a minimum of 4GB memory. The latest in this regard are the DDR3 modules. You can find memory sticks of 1GB, 2GB, 4GB and install them on your mother slots. You should adjust your budget for higher RAM as much as possible.
Motherboard: A motherboard is the main computer base at which rest of the hardware components sits, while it includes the chipset and the BIOS with machine level instructions needed to boot your computer. However modern boards offer built in sound and vga cards as well as Ethernet Lan card for networking. Motherboards for gaming should has fast bus speed to accommodate faster processor, RAM sticks, hard drive etc. Also its give option to add additional cards in the PCI slots, so you can install graphic and sound cards directly into your main board. Finally the communication medium of USB, ATA, SATA are supported from this board. Just make sure the processor you are buying is compatible with your motherboard as not all the CPUs can be installed on any motherboard.
Graphic Card: The quality of the games graphics comes from the graphic card which is also referred to as a video card because it is responsible for rendering all the data sent to the monitor with crystal clear details. Graphic cards contains GPU (graphic processing unit) chip and fan + heat sink to cool it down. It is highly recommended to install a card with minimum 512mb of video memory, the higher is better. If your budget allows go for a 1GB or 2GB card because this is what will change the output quality of your video game, so the kids will enjoy more realistic and truly life like graphic on their computer screen.
Sound Card: As explained earlier you get a integrated sound card in your motherboard chipset which could perform well in most of the cases but when you premium quality audio performance then you should install a separate dedicated sound card for your gaming rig. This is recommended only if you can afford to spent extra cash for your children’s computer. For assembling a cheap gaming computer builtin sound will provide enough performance to keep your child happy.
Hard Drive: For kids storage space does matter a lot, because they are always busy in populating their computer with new programs such as games, movies, photos, you name it and they must have saved it once! In terms of game machine there are two key factors: 1) storage space of HDD and 2) reading and writing speed which is measured in RPM. In an ideal gaming desktop you should install a hard disk with at least 1TB space and 7200RPM speed.
Optical Drive: Reading an writing content from CD, DVDs is crucial for your kids becuause they will need to install new games or run movies that they purchased from the market. Also optical drive is used to write CD and DVD for data backup and creating movie playbacks. Any good super or combo drive that can provide a decent read and write operation of dvd and cd format will work well. These days you can find bluray drives that can let you use blu ray diskettes which has far better storage and video quality
Now What! How To Assemble Into A Gaming PC?
The best way is to find a good PC building guide that can help you understand how to install different components into your computer casing. This kind of guide can be found on the YouTube videos. However in an ideal scenario follow the instructions, each hardware component that you purchase contains a user manual explaining how you can assemble and install into your computer. These DIY manuals are self explanatory and anyone with basic computing knowledge can do it without needing help of a technical person. The gaming case will have a manual that explains each aspect of hardware installation, so you should start with PSU (if not already present in casing) and then place the main motherbaord at the connect-able clips, then you move forward and add the processor, memory, PCI cards and finally connect power and data cables to HDD and Super Drive. Just remember one thing be gentle and do it slowly, so you do not cause any damage to your computer’s internal devices. And off-course you can add the peripheral devices to make it fully functional for your kids. Simply hook the pins of the mouse, keyboard, monitor and speakers for input and output operation of your computer. Finally set up a WiFi or plug in the LAN cable in order to connect with rest of the world!
Bottom Line is: Follow instructions in the user manuals of all hardware components that you bought
Teenagers are the real target market of game manufacturers because children of this age group are always excited to get their hands dirty with newly released video games. Kids are the real test drivers of the video games and game’s success and failure depends on their taste. That’s why games are build by keeping in mind that target audience are children so that they do not loose interest while playing new computer games.


