A Handy 10 Steps Custom Gaming PC Installation Guide
Assembling a custom PC requires knowledge of the computer parts, their compatibility and the selection according to your output needs. First off start by collecting the computer parts from wherever you can get good rates, just make sure your components are compatible and will work fine altogether. The complete set of the gaming machine includes: Gaming level Computer Casing, Power Supply, Processor, Motherboard, RAM, Video Card, Optical Drive, Hard Drive, Mouse, Keyboard and Monitor. For audio output you could either go for a speaker system or a headphone.You will most likely to get a casing with pre-installed power supply box, if not then you should purchase it separately but it might be cost effective to go for a combo package.
How to build a desktop for gaming step by step?
Ten step installation guide for your gaming PC
1- Install the Processor Chip in the Motherboard Plus Heat Sink
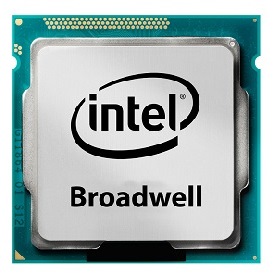
It is always best to start with combining the motherboard and processor. You should do your research earlier and make sure that their is a compatibility exist because your motherboard and processor. For example if you are installing Intel’s Core i7 processor, you will need a motherboard with a socket type of LGA 1155. Simply open the socket cover and install the CPU chip into it. Next install the heat sink directly over the processor and lock down the standoffs. If you face any issues, read the manual that you get in the CPU box.
2- Install the System Memory (RAM) Modules
This is pretty straight forward, these days we use DDR3 memory sticks for the new systems, standard workstation motherboard offers four slots, so allowing you to place up to four RAM modules, most probably you will use two of them. There will be a cut on the interface line of the memory which you should align with the slot in order to install correctly, once matched simply push it downward with your fingers until you hear it locking sound from both ends.
3- Open the Casing and Prepare I/O Plate
Start by unscrew the case from right side, in order to get full access you will need to push the side panel backward which will unlock itself and you can remove the panel. You will have an empty box, which will serve as a container for your new computer. Before you pop in the stuff you need to clear the input/ output plate, this is thin aluminium/ steel plate with holes exactly matching design of the motherboard communication channels. You will need to prepare this plate by opening the blocked holes, use a screwdriver if needed.
4- Install the Motherboard with Standoffs then Power Cables
Lay down your computer case on the ground or table surface, so that the opening end it facing upward. Now place your motherboard at the base by matching the holes of the standoffs, simply punch in the standoff inward, which will gently attach your main board with the casing. Next, you will need to identify power supply cable that goes in the motherboard, actually there are several but it is best to start with large one with at least 10-12 cables hooked into a single switch. For correct installation of PSU power lines, consult the user manual that you received with your mother-board package.
5- Install the Hard Disk and Optical Drives
At the front side of the PC casing, there is a mounted rack with spaces to slide in your drives, the number of storage units varies from casing to casing. First enter the HDD in the middle of the rack and make sure it is aligned to holes from where you can attach the two screws from each side. Regarding the optical drive installation, you should first make an opening by clearing case top most window blocker. This is needed because you need an open end to access the drive from outside, tight the four screws to make sure it is perfectly install in the rack.
6- Plug In the Front-Panel Wires
As a computer user, you normally interact with the front of your casing and the real charismatic effect of your PC case usually comes from the led lights there. If you are going for a gaming case, chances are that it will have all those fancy stuff on front side which is ready to rock. In order to power the front panel lights and power/ reset buttons you need to provide power connection wires from the power supply. While for extended USB and audio jacks you need to connect the data wires from the motherboard to the front panel connectors.
7- Plug In the Data and Power Cables
Finally you need to connect all your internal devices with main board and make sure they are wired correctly through the power supply unit. For storage medium communication with your motherboard you need to use a SATA interface cable which is basically the data transfer channel to and from your hard drive, if you have multiple storage drives installed, connect all of them with separate Serial-ATA cables. Next connect the data cable with your optical disk drive and you are good to go.
8- Install the Graphics Card in an Expansion Slot
This is the most important step of your gaming PC installation, which is to connect your video card in to the main board. For all the dedicated graphics and sound adapters, you install them into the PCI slots. First clear the opening parallel to the PCI channel where you are about to place your graphics card and then simply push in the card by aligning the card bus interface into the slot, if you do it right, the card will move inwards upon little force exerted by your finger in the downward direction.
9- Connect with Monitor and Peripheral Devices
In order to enable input output communication, connect the cables of your mouse, keyboard, speaker and monitor into the switches found in the backside in the I/O plate section. This plate provides direct connection with your motherboard but as we are installing a gaming PC, so the monitor VGA connector will be plugged into the video card interface.
10- Connect the Power Cables into the PSU and Monitor
Final step is to power your computer from a power plug. These days you only need to connect one power cord directly into the power supply box and the second cable comes out of it and goes to the monitor.


